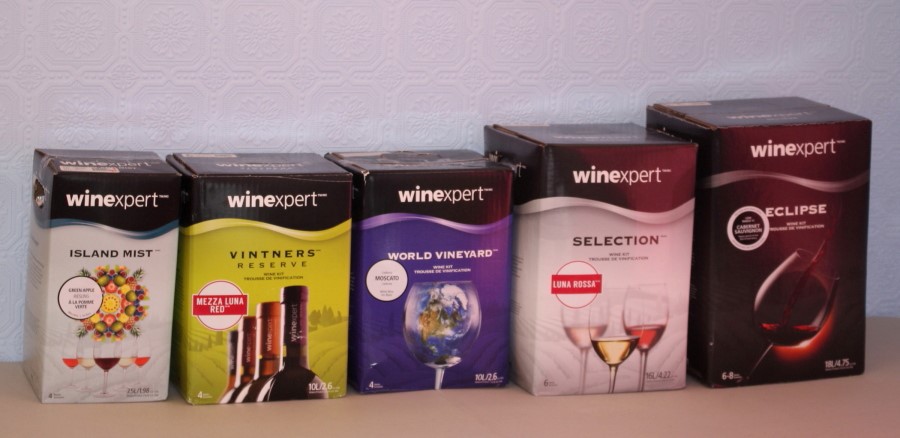
Selecting a wine kit can be a little daunting especially if it’s you’re first one. A lot of factors come into play including the type of wine, cost, kit complexity, processing time, minimum aging time and feedback from other kit winemakers. In this two-part series I’ll try to demystify the process. In this first article we’ll start by identifying the key characteristics that separate one product line from another. In part two we will use these key characteristics to analyze each product line and compare the different categories of kits. Then we’ll finish up by discussing how to select your first wine kit and how your kit choices can help build your wine cellar.
I’ve used the Winexpert product line for examples because those are the kits I am most familiar with. However, the same basic guideline should apply to other kit makers product lines as well as long as they start out with approximately the same number of liters per kit.
Does size matter?
One of the things that puzzled us the most when we first started making wine kits was – other than the price, what is the difference between all these different kit product lines? The short answer is 1) the quality/cost of the grapes used to make the kit and 2) the physical size of the kit. The quality of the grapes seems obvious but does size really matter? The answer, at least in the case of wine kits, is an emphatic “Yes!”
The more expensive kits are roughly twice as large as cheaper kits yet both kits produce the same 6 gallons of wine. This is only possible because the smaller kits have a much higher percentage of juice concentrate (juice with a significant amount of water removed) than larger kits, as a result you have to add a lot more water to make 6 gallons of wine with a small kit.
The use of a juice concentrate provides two benefits. The first and most obvious is that it reduces the size of the package and the weight of the kit thereby saving on storage and shipping cost. The second less obvious benefit is that the concentrate has a much higher sugar level which acts as a preservative to protect the juice in the kit and extend the shelf life. This may seem counter intuitive at first that sugar would protect anything from spoiling but if you think about things that are high in sugar like the sugar bowl on the table, honey, jelly and fruit preserves. They can all sit out for weeks or months without spoiling because of the high sugar content.
The downside of juice concentrates as we all know from experience with things like orange juice and other concentrates is that a little bit of the flavor seems to get lost in the process. Larger kits have a lower percentage of juice concentrate and a higher percentage of regular juice. Basically there is a lot more “stuff” in the juice bag for a “big kit” which gives the wine a richer, more complex flavor. If you take a small kit and a large kit and rehydrated both to 6 gallons and then sample the must before adding the yeast you will find that both taste good but the juice from the larger kit just taste richer. Unfortunately, this enhanced flavor comes at a substantially higher cost in terms of money, effort and aging time.
Wine Kit content differences

Vintners Reserve on the left & Eclipse on the right
One other thing that is different about the larger more expensive kits is that there is frequently a lot of additional flavor enhancing elements packaged with the kit. The first thing you notice in the photo above is that the juice bag for the Vintners Reserve (VR) kit on the left is a lot smaller than the Eclipse kit on the right. The second thing is that there are a lot more packages of stuff on the right. The VR kit has on one 60g bag of toasted powdered oak in the white bag in the lower left corner and one package of a clearing agent in the clear bag next to the oak. The other smaller packages are the chemicals and yeast that come with all kits.
The first thing that you will notice about the Eclipse kit on the right besides the size of the juice bag is that there is another smaller bag in the back that looks like a smaller version of a juice bag. This bag contains grape skins that have been chopped into something resembling a thick paste. The small clear plastic bag under the right corner of juice bag contains a beige colored stretchable mesh bag. The contents of grape skin bag are poured into the mesh bag, which is then tied off at the top and added to the must (grape juice) in the primary fermenter. This is similar to the process used for red wines made from fresh grapes where the juice is allowed to sit on the grape skins in the early stage of fermentation to absorb color and flavor.
The Eclipse kit also has a total of 5 bags of toasted oak. There are two brown bags containing 30g each of powdered oak to be added in the primary and three white bags containing 30g each of oak cubes to be added in the secondary. The amount of oak, if any included in an Eclipse kit depends on the type of wine. This particular kit also contains two clear packages of fining agents. This is not always the case. Apparently the manufacturer thought this particular kit might need a little extra help clearing. Likewise some Eclipse kits will have two packages of yeast. Unlike the less expensive kits, the Eclipse kits also come with a package of really nice labels pictured here in the center underneath the juice bag.
Clearly there are a number of differences between the lower priced kits and the expensive kits but this doesn’t mean that the smaller, inexpensive kits don’t make good wine. Every one of the smaller kits we’ve made has turned out great. In fact we have won four medals in the annual Winemaker Magazine’s International Amateur Winemakers Competition with Island Mist and World Vineyards kits. The wine we make from these kits cost us roughly $2.50 to $3.00 per bottle but they are as good or better than any $8-12 bottle of wine on the grocery shelf.
Differences in aging times – How long must I wait?
One other major difference between lower priced kits and high end kits is the amount of aging time required before they are ready to drink. When you read about the aging time the manufactures quote one thing to keep in mind is that the marketing department is selling the idea that making wine from kits is easy and fun and that you can make great tasting wines in a short period of time. As a result they tend to quote very optimistic times for how soon you can drink your wine. Everyone’s taste is different. For some people a wine may taste fine after the short aging period quoted by the manufacturer but most people seem to age their wines quite a bit longer. The aging times provided in part 2 of this series are based on our experience, numerous customer reviews of various wines and a great deal of on-line research.
However, when it comes to your kit wines, the only opinions that really matter are yours and the people you serve it to. If you are all happy with the taste then you can start drinking it. Just remember that it will probably still continue to improve with age for a while so be sure to save a few bottles to enjoy in the future. Then keep notes on how the taste changed over time. The notes will serve as a good guideline for aging the next time you make the same kit or one that is similar.
One other thing to keep in mind is that red wines usually take significantly more time to mature than whites, typically 50% to 100% longer or more. For example if a white wine from a given product line takes 6 months to mature then a red from that same product line will likely take 9-12 months.
Tune in next time for Part 2 in the series when we will analyze each product line individually to see how they compare using the key characteristics identified in this article. Then we’ll finish up by offering suggestions on picking your first kit(s) and a strategy for building out your wine cellar.